Plugging into the Sun
Last Updated: 3/6/19
With a fascination for renewable energy technologies, I figured the best way to explore would be to build my own. So, I made a photovoltaic battery charger to charge my phone with sunlight.
Project Background
Since January of 2018, I have been tinkering with renewable energy electronics to teach myself about design considerations for grid scale solar plus storage systems. I’m currently building a solar-powered, rechargeable USB power supply to charge my phone with sunlight. I initially began this project using NiMH cells, but have recently made the switch to 18650 Li-ion cells and redesigned the circuit to add a battery management system (BMS) with overcharge protection, excessive discharge protection, state of charge (SoC) and state of health (SoH) estimation, a cell balancing mechanism, and thermal control.
Photovoltaic Battery Charger Status:
✅ Battery to USB Circuit
✅ Solar Panel to Battery Circuit
✅ Charge iPhone with Sunlight
The Photovoltaic Battery Charger
System-Level Overview
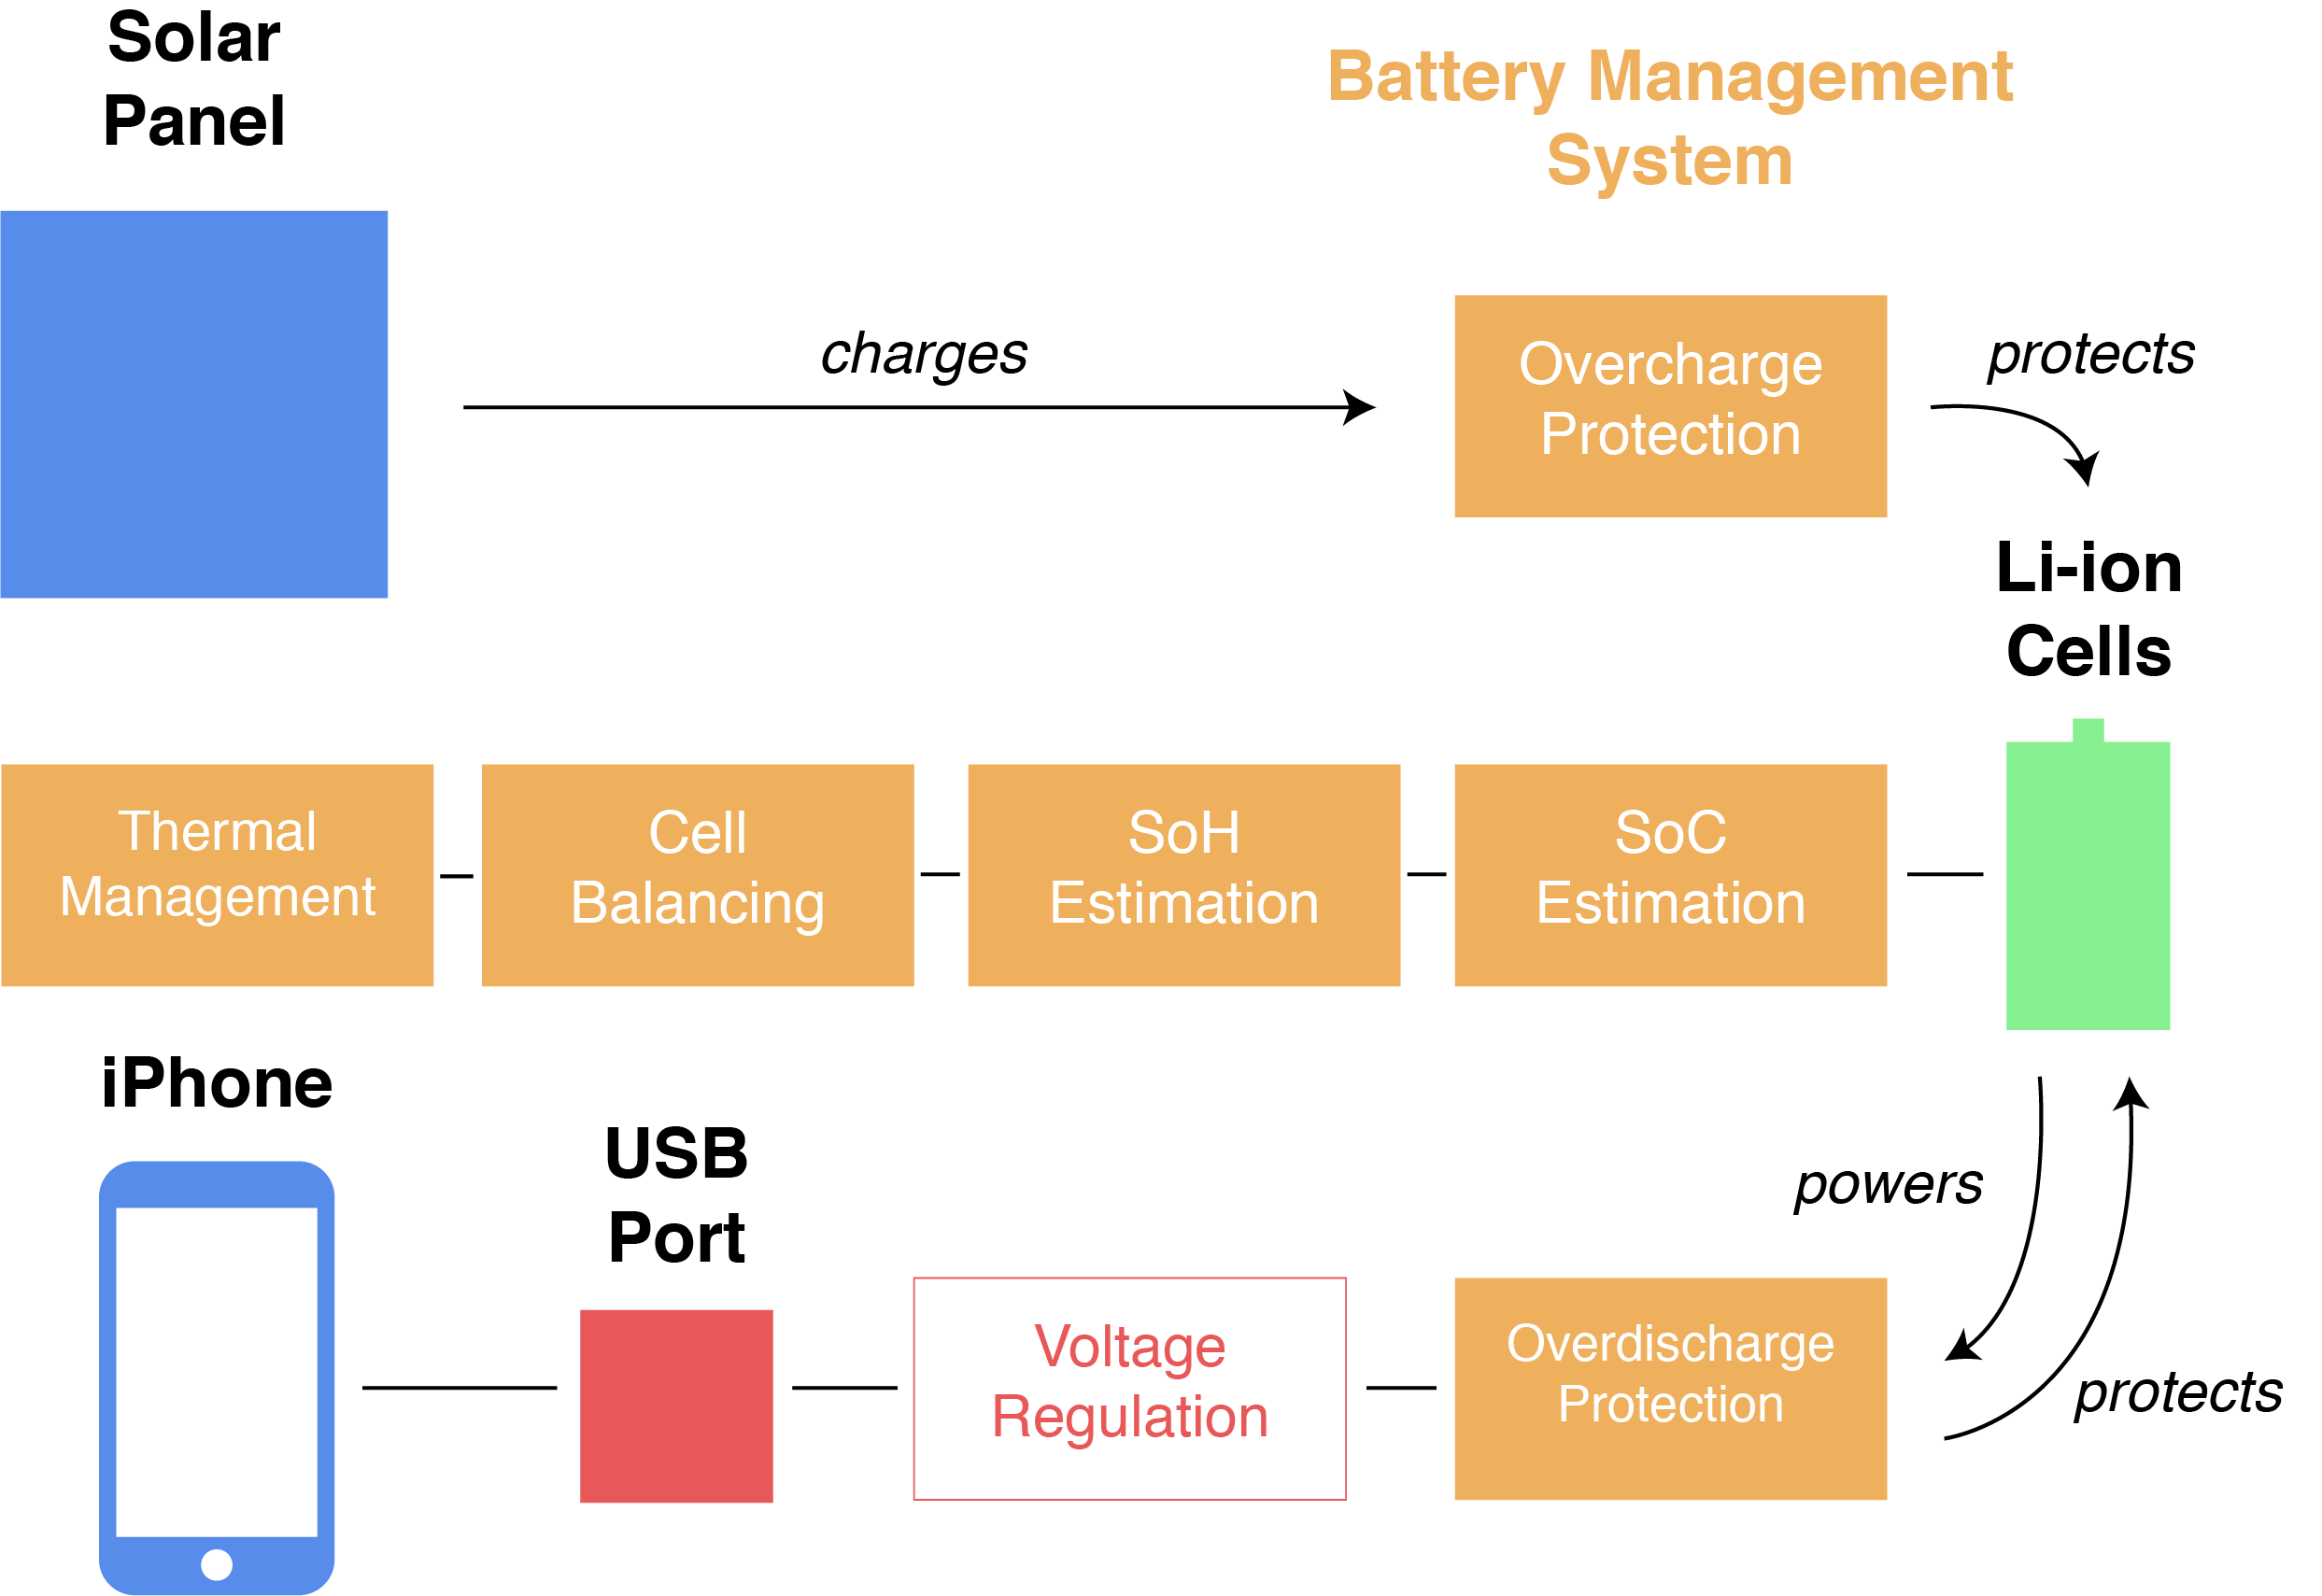
Simple View The circuit has two halves, both of which rely on the Li-ion cells in the center. This figure shows a simplistic view of each major components.
This device essentially has two modes: charge and discharge. In the charge mode, a 12W photovoltaic solar panel charges 2 18650 Li-ion cells in series. In discharge mode, the 2 Li-ion cells charge a USB-device (an iPhone in my case).
Learnings from the v1 Charger with NiMH cells
Full View This diagram shows how the battery management system (orange boxes) interfaces with the photovoltaic battery charger.
You can see my original NiMH system here, which I completed and successfully charged my phone with sunlight with. Admittedly, after learning a significant amount about design considerations for modern cell systems, my original plan was quite primitive and lacked protection mechanisms required to preserve the health and safety of the battery. Hence, I am working on v2 using the 18650 Li-ion cell (essentially an industry standard) with a BMS.
I was able to successfully charge my phone, fine-tune the voltage regulators for battery discharge, and turn my Arduino into an automated voltmeter and ammeter. I also discovered that a closed circuit voltage drop across the cells while charging is an insufficient way to measure the SoC of the batteries. These learnings have allowed me to increase the complexity of the v2 charger with Li-ion cells.
Current Component List
Batteries: 4 18650 Li-ion cells, rated at 3.7V / cell with 3000mAh (link)
Photovoltaic Panel: 3W, 12V, 250mA from Sunnytech (link)
Microcontroller: Arduino/Genuino Uno (link)
Voltage Regulator: LM2575T-5.0 switching-mode regulator from Texas Instruments (link)
Various Circuit Components: Detailed below, mostly ordered from Digi-Key
Project Status
I am currently spending the majority of my time on the Li-ion battery management system, which can be found here. Once the BMS is completed, I will integrate it with the photovoltaic battery charger and update this page. In the mean time, head to the battery management system page for the latest updates!
Updated 3/28/19
Thanks for reading!
If you’re interested, check back every few weeks for more project updates. Also, if you have any comments or questions, or just want to get in touch, you can contact me here.


